In the world of makeup, highlighter is a must-have makeup product to bring out your natural radiance and add a sun-kissed glow to your complexion. Whether you're a makeup enthusiast or a beginner, understanding the proper placement of a highlighter is essential to achieve a natural and luminous finish.
In this beauty blog, "Where to Apply Highlighter on Your Face?" we will talk about the different areas of your face where you can apply highlighter to achieve the best results. So, let's dive in!
What is a Makeup Highlighter?

Highlighter makeup is a makeup product, designed to add luminosity and radiance to the skin. It typically comes in a powder, cream, or liquid form and contains light-reflecting particles that create a glowing effect when applied to specific areas of the face. Facial Highlighter is used to accentuate the high points of the face, giving the illusion of a youthful and healthy complexion.
Types of Highlighters
1. Powder highlighters: These are the most commonly produced and versatile.They can be applied with a brush and are ideal for a buildable glow. They work well for all skin types but are especially good with oily skin types.
2. Cream highlighters: Creams provide a more natural, dewy finish. They are applied using fingers or a brush and provide good effects with dry to normal skin types.
4. Liquid Highlighters: These highlighter give a great deal of shine and can be mixed with foundation to achieve an all-over glow or applied to high points on the face.
5. Stick Highlighters: Convenient and travel-friendly, this stick highlighter allows users to quickly and easily apply highlighter on the go.
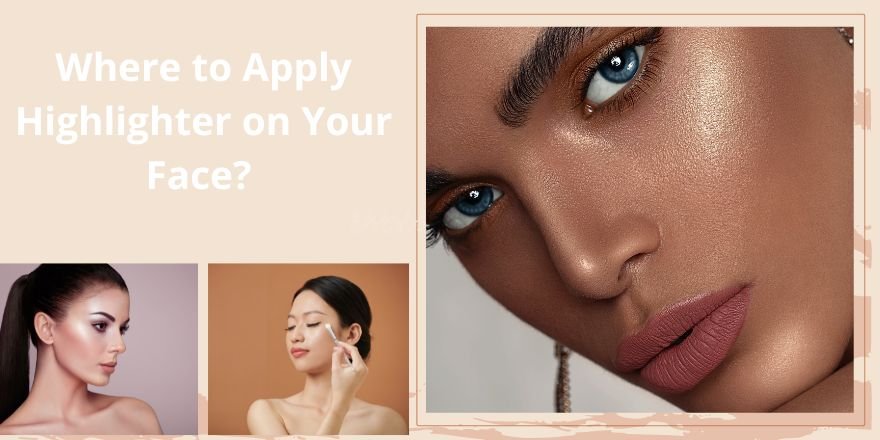
Where to Place Highlighter on Face: 6 Key Areas for Maximal Glow

When applying highlighter, you must know where to apply highlighter makeup on your face.You need to figure out the high point of the face that naturally catches the light and is ideal for highlighting. By strategically applying highlighter to these areas, you can create a beautiful, sculpted look. Here are the main high points of the face where you can work for highlighter placement.
1. Cheekbones
One of the most popular areas to apply highlighter makeup is on the cheekbones. This technique helps to accentuate the natural contours of your face and create a lifted effect. To apply highlighter on your cheekbones, start by using a fluffy brush or a fan brush to lightly dust the product on the highest point of your cheekbones. Blend it outwards towards your temples for a seamless finish. This will give your face a beautiful, sculpted look.
2. Brow Bone
Applying highlighter makeup on your brow bone can instantly lift your eyes and make them appear more awake and youthful. To do this, take a small brush and apply a small amount of highlighter on your brow bone, just below your eyebrow. Gently blend it out using your finger or a clean brush. This will create a subtle highlight that will make your eyes pop.
3. Cupid's Bow
Another popular area to apply the highlighter is Cupid's bow. The cupid's bow is the area right above your upper lip, and highlighting this area can give your lips a fuller and more defined look. To apply a highlighter on your cupid's bow, take a small brush or your finger with a light hand and apply a small amount of highlighter in the center of your top lip. Blend it outwards towards the corners of your lips, including the bottom lip. This will create a beautiful, pouty effect and add dimension to enhance the beauty of your lips.
4. Bridge of the Nose
Highlighting the bridge of your nose can help to create the illusion of a slimmer and more defined nose. To do this, take a small brush and apply a thin line of highlighter down the center of your nose. Blend it outwards using your finger or a brush. Be sure to blend it well to avoid any harsh lines. This will give your nose a subtle glow and make it appear more sculpted.
5. Inner Corner of the Eyes
Applying highlighter to the inner corner of your eyes can brighten up your entire face and make your eyes appear more awake and refreshed. To do this, take a small brush and apply a small amount of highlighter to the inner corner of your eyes. Blend it gently using your finger or a brush. Applying highlighter in the inner corners of the eyes will instantly open up your eyes and give them a beautiful, luminous look.
6. Forehead
Apply a highlighter to the center of your forehead to enhance your overall glow and give off that youthful vibe. Follow this technique creating a Dot highlighter onto the center of your forehead, just above your brows. Gently blend the highlighter out toward your hairline, which will seamlessly give you a glowing finish.
How to Apply Highlighter on Your Face? A Step-by-Step Breakdown:

Once you know where to apply highlighter, it is also important to know How to use highlighter. Remember that the application process depends on the highlighter formula you're using. Applying a highlighter on your face can add a beautiful glow and increase your facial features. Here's an easy step-by-step breakdown of how to apply highlighter:
- Prepare your face: Always start your Skincare routine with a clean and moisturized face. Moisturizing your face helps to hydrate your skin and helps in the easy application of other makeup products.
- Apply your foundation and concealer: Apply your foundation, concealer, and any other base makeup you usually wear, ensuring it closely matches your skin tone.
-
Choose the Right Highlighter Shade: When selecting a highlighter,
consider your skin tone, undertone, and desired look:
2. Medium Skin: Opt for golden or peachy highlighters to enhance warmth and radiance.
3. Dark Skin: Bold gold or bronze highlighters create a stunning, luminous effect.
4. Undertones: Cool undertones suit silvery or pink shades, while warm undertones pair well with golden or peach hues.
- Determine the areas to highlight: Before applying highlighter makeup, it is essential to determine the high-area points of the face that can naturally catch the light. These typically include the tops of your cheekbones, the bridge of your nose, the cupid's bow (the area above your upper lip), the inner corners of your eyes, and the brow bone, which complement your bone structure.
- Pick your tool: You can apply a highlighter using makeup sponge, a brush, or even with finger tips. Each tool provides a different level of strength, so choose one that suits your preference.
- Apply the highlighter: Take a small amount of highlighter on your chosen tool. If you're using your fingers, dab them lightly into the product. If you're using a brush or a makeup sponge, blend it gently and dust off the extra products. Apply highlighter gently on the areas mentioned above.
- Check the overall effect: Take a step back and assess the overall effect of the highlighter on your face. Add a little more product or blend further for a softer look if needed.
- Set your makeup: If you want your highlighter to last longer, you can lightly dust a translucent setting powder or mist the setting spray over your face. Be careful not to apply too much, as you don't want to diminish the glow of the highlighter.
Remember, the key is to apply highlighter with a light hand and gradually build up the intensity. Practice and experimentation will help you find the application technique that suits your desired look and help you achieve the desired results.
Common Highlighting Blunders To Avoid
Using improper highlighting techniques can leave you looking more disco ball than refined radiance. Follow these quick tips while applying highlighter on your face to avoid common blunders.
Applying too much: Always start with less and blend well before adding more product. More doesn't mean more glow.
Using too dark a shade: The highlight should be lighter than your natural skin tone for a seamless lit effect. Too dark and it's just regular bronzer.
Not blending properly: Harsh lines of unblended highlighter come across as unattractive stripes on the face. Take time to blend edges well.
Over-powdering dry skin: Powder formulas can emphasize dry patches and fine lines if over-applied on dehydrated skin. Use creams or liquids here.
Highlighting unevenly: Stick to emphasizing both sides of the face symmetrically for balance and harmony - like both cheekbones, temples etc.
Forgetting nose: Don't ignore your nose - highlighting it balances out the overall look without being over.
Final Thoughts on Correct Highlighter Placement
Highlighter is a versatile and essential beauty product that can elevate your makeup look and give you a radiant and gorgeous glow by highlighting on face. By knowing where to apply highlighter on your face and following the proper techniques, you can achieve a natural and luminous finish. Embrace your inner glow and let your face shine! Happy highlighting!
Like this article? Share it with your friends by clicking the icons below!