Have you ever sat and wondered how to achieve that perfect blush of colour on your cheeks? With years of experience as a makeup artist, I've discovered that blush is a magical product. When applied correctly, it can bring warmth, definition, and a natural glow to any makeup look. Blush can instantly elevate your look from tired to vibrant and can be applied using various tools, each offering a different finish and effect. Whether you're going for a subtle, everyday look or something more dramatic, the right blush application can elevate your entire makeup, giving you a fresh, vibrant appearance that lasts all day. But blush can be one of the most confusing makeup products to use and is often more complex than simply swirling it on your cheeks.
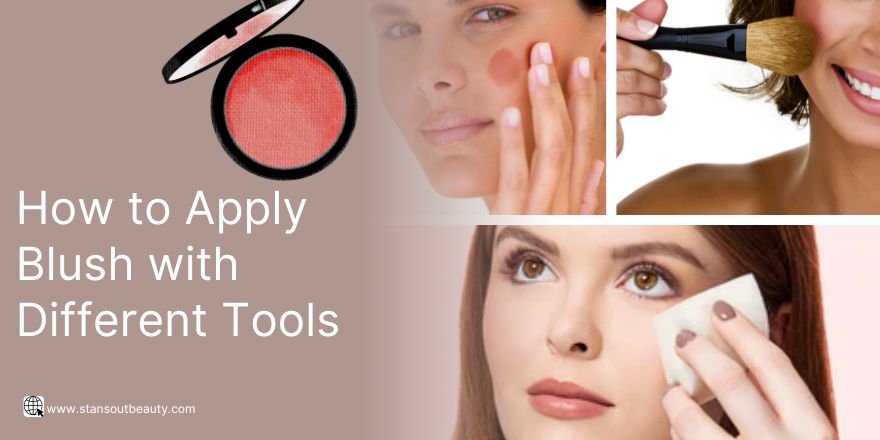
In this guide, I will share my insights on how to apply blush using different makeup tools, including brushes, sponges, fingers, and even some unconventional methods. Whether you are looking to achieve that flush of natural color or simply a bold pop of color, this blog will help you get the right application every time.
Understanding Different Types of Blush Formulas
Before diving into the application tools, it's essential to understand the different types of blush formulas that can be perfect according to your skin type. The texture and consistency of the blush can influence the tool you choose and how you apply it. The main types of blush include:
- Powder Blush: This is the most traditional and usable form, making it perfect for oily to combination skin. When you apply powder blush, it tends to provide a matte or satin finish and is great for layering to build up the intensity.
- Cream Blush: Cream blushes give a dewy, skin-like finish and are great on dry to normal skin types. When you apply cream blush, it blends well into the skin for that flushed, natural no-makeup look.
- Gel Blush: Most gel blushes are lightweight and usually have a translucent finish. They work great for fresh, youthful skin. Gel blushes do not highlight pores and fine lines, and work well for most skin types, especially oily.
- Liquid Blush: These are like gel blushes but with a runnier texture. To apply liquid blush, use sheer or buildable liquid blush that spreads into the skin easily and naturally.
- Tint Blush: Tint blushes are very pigmented and stain the cheeks for a long time. They are perfect for those who want a subtle, natural color that would last all day.
How to Apply Blush? 7 Simple Expert’s Tips

Before applying blush, it's essential to prep your skin to ensure a smooth and flawless application.
1. Prep and Prime:
Start with a gentle cleanser or mild soap for 1 minute ( cleansing is essential because all the dirt has to be cleaned from the face). Exfoliate to remove the dead skin cells, apply your normal skincare, and let it absorb properly. Then, follow with your favorite facial cream and get a well-moisturized face to apply makeup later. Finish with a light primer or concealer that works for your skin. This step minimizes the appearance of pores and makes your blush look great & last all day.
2. Choose the Right Blush Shade:
Choosing the right blush shade is equally crucial. Your skin tone guides you to the most flattering shades.
- Fair skin: The best shades for fair skin are soft pinks, peaches, and light corals.
- Medium Skin: Mauves, rosy pinks, and apricots enhance medium skin tones.
- Olive skin: Warm peaches, oranges, and deep pinks work best for olive skin tones.
- Dark skin: Rich plums, deep roses, and bright oranges bring out the best in dark skin tones.
3. Choose Your Tool:
After selecting the right blush shade that matches your skin tone, choosing the right tool to achieve the perfect application, each with a unique finish is necessary.
- Blush Brush: Perfect for powder blush. Dip lightly, tap once or twice to remove access dust, and apply. Sweep it from your cheeks or temples.
- Stippling Brush: Ideal for a sheer finish. Dab lightly into blush, then tap onto cheeks in circular motions for a soft, diffused look.
- Beauty Sponge: Best for cream and liquid blushes. Wet the sponge, dab it into the blush, and gently bounce it onto the cheeks for seamless blending.
- Fan Brush: Perfect for a light, airy application. Sweep lightly through blush and gently brush over cheeks for a soft natural look.
- Kabuki Brush: Ideal for powder blush. Swirl into blush, tap off excess, and blend onto cheeks in circular motions for smooth, even coverage.
- Flat Foundation Brush: Useful for cream or liquid blushes. Dip into blush, then sweep onto cheeks and blend edges for a sculpted look.
- Contour Brush: Designed for defining cheekbones. Apply blush just below the cheekbones, then blend upwards towards the temples for a lifted effect.
- Fingers: Great for cream, gel, and tint blushes. Dab blush onto fingertips and tap onto cheeks, blending with circular motions for a natural finish.
4. Locate the Apples of Your Cheeks:
To pinpoint the apples of your cheeks, smile slightly to reveal the fullest, roundest part of your cheeks. This area, which appears prominently when you smile, is where you should apply your blush. These are the perfect areas to start blushing on as they add shimmer and give you a more radiant look. When you concentrate on these regions, make sure that the blush brings focus to the highest areas of your cheeks for well-balanced as well as youthful looking skin.
5. Apply Blush:
Make sure you put the blush according to your face shape for a natural look.
- Round Face: Apply blush just below the apples and blend diagonally towards your temples to elongate a round face.
- Oval Face: Apply blush on the apples and blend gently up to highlight bone structure.
- Square Face: To make harsh angles softer, apply blush to the apples and blend in gentle, circular motions towards your temples.
- Heart-Shaped face: Apply blush to the apples and sweep towards your ears for just enough emphasis on a wider forehead, but minimal pop on a narrow chin.
- Long Face: Use blush on the apples and blend across your face towards the ears for a horizontal sweep approach to enhance this area.
6. Adjust Intensity:
Start with a light application of blush and gradually elevate the color intensity to how you like. Layering the blush can help to build up color slowly so that you do not overdo it. This way, when blended out properly, your cheek looks more natural for a longer period as well. Start with a little bit of product and then blend more in between each layer until you're happy with the results. This helps avoid putting on too much and you can reach the exact shade of color that goes with your style or event each time.
7. Set your makeup:
After applying and blending blush, finish the process of layering with a setting spray or loose translucent powder. This step helps to lock in your blush and other makeup products, ensuring they stay in place throughout the day. A setting spray provides a dewy finish and sets the whole look in place while adding some loose powder provides a matte finish. Both of these help to keep the makeup fresh and stop it from fading or smearing.
How to use Blush: Using Brush, Sponge, and Your Fingers

Applying blush can vary significantly depending on the tool you use—whether it's your finger, brush, or sponge. Each method offers a unique finish and can be tailored to different blush formulas and desired effects.
Applying Blush Using a Makeup Sponge
Applying blush with a makeup sponge is a versatile method that can deliver a smooth, seamless finish, especially when working with cream or liquid blushes. The different parts of the makeup sponge help in different purposes for a perfect application.
- Gently wet the makeup sponge to turn it soft and flexible which helps it to work well in the product blending.
- Dab the sponge into the blush, taking a perfect amount of product on it.
- Dab the sponge gently with a bouncing action onto the apples of your cheeks.
- This technique helps you blend the blusher on your skin in such a way that it gives a natural, dewy finish without messing up the foundation or any other base makeup.
Recommended to Read: How to Use Makeup Sponge
Recommended Sponge For Flawless Blush Application
Having spent a decade in the beauty industry, I confidently recommend the StansOut Beauty Sponge for flawless blush application. This versatile tool is soft, latex-free, and uniquely effective, whether dry or slightly dampened. Its innovative design effortlessly blends various blush formulations, including cream, liquid, and powder, achieving a seamless and natural finish every time. Whether you're new to makeup or a seasoned artist, the StansOut Beauty Sponge enhances your blush application technique, effortlessly ensuring a radiant and harmonious look.
StansOut Beauty Sponge features a soft, porous texture and versatile shape, ensuring seamless blush application and minimal product wastage for a flawless finish.

Applying Blush Using a Brush
Using a blush brush is a classic method, perfect for powder blushes. When you apply blush with a brush, it helps achieve a well-blended, natural look.
- Start Choosing the Right Brush using a fluffy or angled blush brush, depending on the level of precision you want.
- Lightly dip the brush into the blush, tapping off any excess powder to avoid over-application.
- Smile slightly to locate the apples of your cheeks. move the brush in a circular or sweeping motion outward to the temples from the apple of your cheeks.
- Ensure to blend the blusher well to avoid harsh lines making a smooth finish to define your features.
Applying Blush Using Finger
Applying blush with your fingers offers great control and is especially effective for cream, gel, or tint blushes. When you apply blush with your fingers, it allows the product to melt seamlessly into your skin.- Put a small amount of the blush onto your fingers to warm it up, allowing it to go on easier.
- Emphasize the apples of your cheeks by smiling, then pat the blush on the apples with your fingers.
- Using your ring finger, smoothen the blush in a circular motion, pressing it outwards so that it perfectly merges into your skin.
- The warmth of your fingers helps the product blend easily leaving a soft, glowing finish.
Creative Blush Application Ideas for Your Routine
Blush isn't just for your cheeks! Here are quick, creative ways to incorporate it into your daily makeup routine:
- Eyeshadow: Swipe your blush on your eyelids for a soft, monochromatic look all over that adds a balanced look to your whole eye makeup. This trick infuses warmth and a subtle pop of color into your eyes.
- Lip Tint: Pat the blush on the lips, then blend for a natural, stained effect perfect to give a quick polished look. It adds color without needing a different lip product.
- Contour: Contour the cheekbones, jawline, and even the sides of the nose with a deeper shade of blush to add dimension and structure, using nose contour techniques for a soft, natural finish.
- Under Foundation: Try putting blush underneath your foundation for a subtle, glowing finish that seems to give a subtle, glowing finish. That's just an amazing way to make your complexion naturally radiant.
- Bronzer: A warm-toned blush acts like a bronzer, giving just that hint of sun-kissed warmth to the face. Apply it around the areas that catch the sun first, like your forehead, nose, and chin.
- Color Correcting: Apply a peach or coral-colored blush underneath your foundation to even out all dull or discolored parts of your face for an even tone; this adds freshness to the look.
- Faux Freckles: Dot some blush lightly over the nose and cheeks for cheeky, faux freckles. Then blend out for a natural sun-kissed look. This playful technique gives your makeup a little bit more youthful and natural effect.
- Highlight Mix: Mix your blush with a highlighter before applying it to the cheeks to keep your look glowing. Strong. It enhances the bones of your cheeks, giving you luminous, dewy skin.
Note: At the end of use of your blush brush, wash your brush or sponge and store it inside the blush container. This keeps your blush applicator clean, and fresh for next use.
Final Thoughts on Applying Blush
Figuring out how to apply blush according to your face shape can boost your makeup routine. You'll enhance your natural beauty effortlessly by picking the right blush color and using easy techniques for round, square, oval, diamond-shaped, or heart-shaped faces. Whether you like a soft glow or defined cheekbones, these simple tips help you highlight your best features. Keep practicing and enjoy exploring your beauty style. Mastering the blush application is an excellent start to feeling confident and looking radiant every day.
Like this article? Share it with your friends by clicking the icons below!